so, we want to add an
inventory item. to keep things simple, it will be one that you just start the game already holding.
but before we can add an item, we need to have a visible
inventory item window added to the screen. since I started with the
Empty Game template, there is no visual interface at all yet. let's change that...
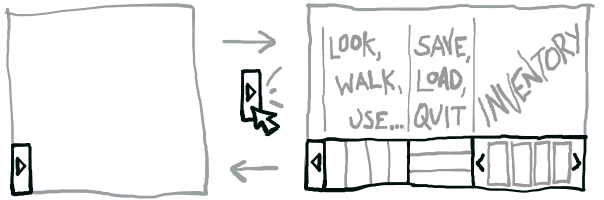
first, plan out a bit what you want the interface to be like. here's what I came up with:
- a little button permanently in the bottom left corner of the screen
- clicking the button expands out to a panel that stretches across the bottom of the screen
- clicking the button again collapses the panel back
- the panel is split into 3 sections:
- verb buttons: for "talk to", "look at" etc.
- system action buttons: for "save", "load", "quit" etc.
- inventory window: a single row of items, with arrow buttons on either side to step through, one item at a time
of course there are lots of variations that you could do, depending on taste & the type of game you want to make. if you would like to know how to do any different kind of interface, please do post a description/mockup of what you have in mind (or just namedrop games that do it the way you want)...
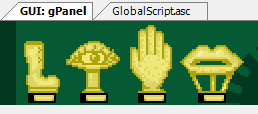
ok, once you are happy with the design, we need some graphics for it. here is a double-sized version of the interface graphics I created for this tutorial:
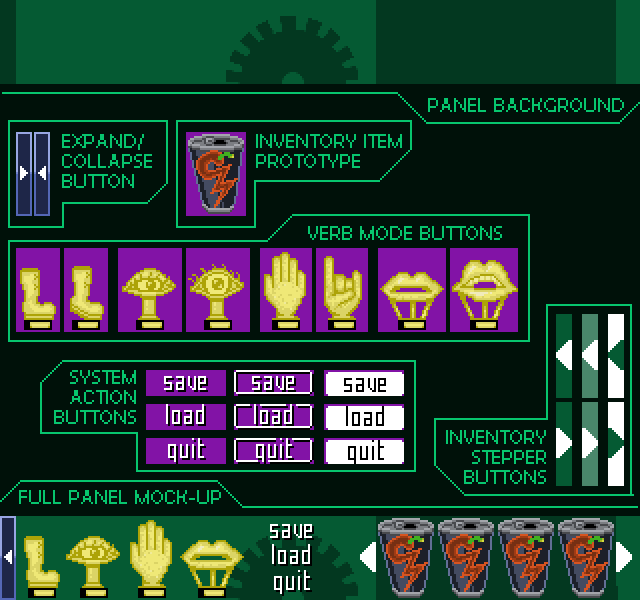
i know there is a bunch of stuff here, but hopefully it isn't too incoherent... at the bottom is a full composite mock-up of how the interface would appear in the final game. above it are all the isolated components -- including
the first inventory item graphic. it's important to do this here because you need to decide the size of inventory item image that you want to use for your game, so that you can determine the size of the inventory item window. here, the inventory item is
30 pixels wide & 42 pixels tall, so I've made sure the inventory item window space fits exactly four of these items in a row.
let's import the graphics. first, create a new sprite-folder named "
Inventory", and add the inventory item prototype to that.

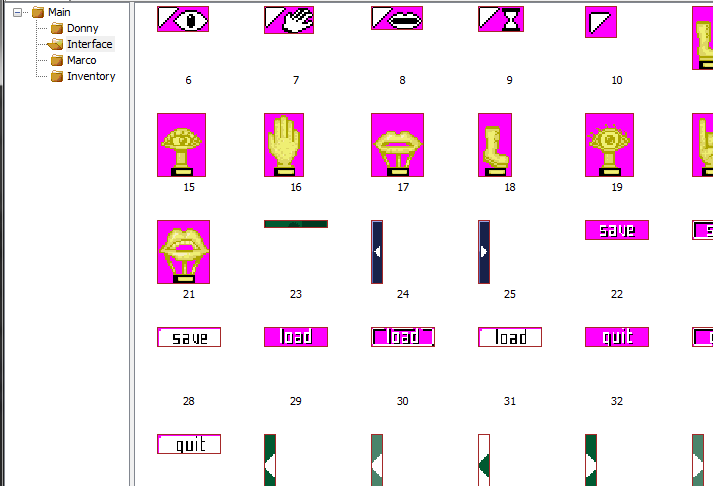
everything else (including the panel background at the top, but NOT including the mockup at the bottom) should be imported into the "
Interface" sprite-folder that we created previously (for the mouse cursors). note that the
expand/collapse button,
inventory stepper buttons and
panel background should be imported with "Transparent colour" set to
No transparency.

...don't forget to set it back to "
Top-left pixel" for the others. at the end your Interface sprite-folder should look something like this:
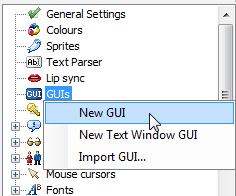
ok, next thing. right-click on
GUIs and select
New GUI.
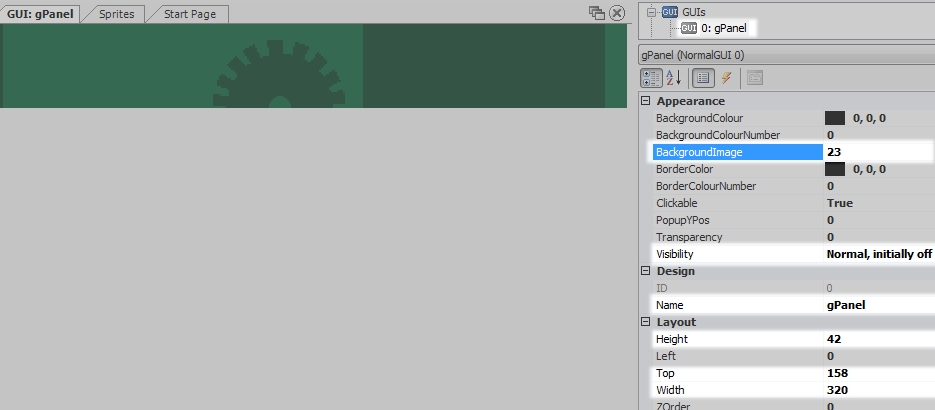
in the Properties for the new GUI, set the following values:
- Name: gPanel
- Visibility: Normally, initially off
- Width: 320 -- i.e. width of the panel background, in pixels
- Height: 42 -- i.e. height of the panel background, in pixels
- Top: 158 -- i.e. the height of the screen minus the height of the panel, so it rests at the bottom
- BackgroundImage: (select the panel background sprite, using the sprite selector)
right-click on
GUIs & choose
New GUI again. this time with these properties:
- Name: gPanelOpener
- Visibility: Normally, initially on
- Width: 8
- Height: 42
- Top: 158
- BackgroundImage: (of the 2 expand/collapse button sprites, select the one with the right-pointing white arrow on it)
and then create a third GUI, with
these properties:
- Name: gPanelCloser
- Visibility: Normally, initially off
- Width: 8
- Height: 42
- Top: 158
- BackgroundImage: (the other one of the 2 expand/collapse button sprites)
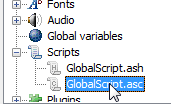
expand
Scripts and double-click
GlobalScript.asc:
scroll right down to the bottom of the script file, and add these lines to the end:
function OpenPanel()
{
  gPanel.Visible = true;
  gPanelOpener.Visible = false;
  gPanelCloser.Visible = true;
}

function ClosePanel()
{
  gPanel.Visible = false;
  gPanelOpener.Visible = true;
  gPanelCloser.Visible = false;
}
now go back and edit the
gPanelOpener GUI again. switch from Properties to Events, and create a new event handler for the
OnClick event. the new function will look like this:
function gPanelOpener_OnClic(GUI *theGui, MouseButton button)
{
}
change it to this:
function gPanelOpener_OnClic(GUI *theGui, MouseButton button)
{
  OpenPanel();
}
now do the equivalent thing for
gPanelCloser: create an
OnClick event handler, and set it to call our
ClosePanel() function.
ok!! if you run the game at this point, you should be able to expand and collapse the panel, like this:
nice but a bit empty.... back in the editor, open the
gPanel GUI for editing. click the "
Add GUI Button" icon in the icon bar, and click'n'drag a rectangle like this (precise size and shape doesn't matter, we can adjust it in a moment):
in Properties, set the
Name for this new button to
btnWalkTo. then set its
Image -- in the sprite-chooser, take the first of the two "boot" images from the "Verb Mode Buttons" set (the one with its heel flat on the ground). choosing this image will automatically set the button's
Width and
Height properties to the size of the sprite.
(AGS helps you out here, unlike when you set the background image of the GUI itself...)also, set the
PushedImage property to the second "boot" image, the one with its heel raised off the ground.
you can adjust the position of the button by dragging it with the mouse. avoid the bottom-right red dot, though, or you will resize the button instead of moving it. get it about here:

once you are happy with the position, set the button's
Locked property to
True. it's a good idea to do this whenever you've added something -- it just means you can't accidentally move/resize the button in the visual editor (easier to do than you might think...)
next create an
OnClick event for the button, and set it to this:
function btnWalkTo_OnClick(GUIControl *control, MouseButton button)
{
  Mouse.Mode = eModeWalkto;
}
now repeat the process for creating three more buttons, for the other modes -
btnLookAt,
btnInteract and
btnTalkTo. space them out a little bit:
the
OnClick event handlers for these new buttons should look like this:
function btnLookAt_OnClick(GUIControl *control, MouseButton button)
{
  Mouse.Mode = eModeLookat;
}

function btnInteract_OnClick(GUIControl *control, MouseButton button)
{
  Mouse.Mode = eModeInteract;
}

function btnTalkTo_OnClick(GUIControl *control, MouseButton button)
{
  Mouse.Mode = eModeTalkto;
}
if you run the game now, you should be able to use the buttons to switch between the different mouse modes:
next we want to add the three "system action" buttons -
btnSave,
btnLoad &
btnQuit... similar thing to the verb buttons, except of course they are stacked vertically, and there are
three sprites for each one. for each button you should set the
Image property to the first sprite,
Mouseover Image to the second, and
PushedImage to the third.
here are the
OnClick event handlers for you to set up with these buttons:
function btnSave_OnClick(GUIControl *control, MouseButton button)
{
  SaveGameDialog();
}

function btnLoad_OnClick(GUIControl *control, MouseButton button)
{
  RestoreGameDialog();
}

function btnQuit_OnClick(GUIControl *control, MouseButton button)
{
  QuitGame(true);
}
this will bring up the standard built-in dialogs for saving, loading and "are you sure you want to quit?"-ing.
(if we did QuitGame(false); instead of QuitGame(true); the game would close immediately, without confirming) of course you
can make your own fully-customized versions of those dialogs too... but let's leave that for another time...
now let's add the
inventory item window. in the icon bar click the little coffee cup icon, and drag out a rectangle that covers the dark rectangle on the right hand side of the panel:
again, don't worry too much about getting the shape exactly right first time, you can always adjust it using the Properties. they should be:
- Left: 188
- Top: 0
- Width: 120
- Height: 42
while you're there, set these as well:
- Name: invMainInventory
- ItemWidth: 30
- ItemHeight: 42
the final two buttons we need to create are the little arrows on the left and right side of the inventory window. name these
btnInvLeft and
btnInvRight, use the sprites from the
"inventory item stepper" section for Image/MouseoverImage/PushedImage, and set up these OnClick events for them:
function btnInvLeft_OnClick(GUIControl *control, MouseButton button)
{
  if (invMainInventory.TopItem > 0)
  {
    invMainInventory.TopItem = invMainInventory.TopItem - 1;
  }
}

function btnInvRight_OnClick(GUIControl *control, MouseButton button)
{
  if ((invMainInventory.TopItem
    + (invMainInventory.ItemsPerRow * invMainInventory.RowCount)) < invMainInventory.ItemCount)
  {
    invMainInventory.TopItem = invMainInventory.TopItem + 1;
  }
}
...and that's it for the GUI!
now let's make ourselves an inventory item... right-click
Inventory items and select
New Inventory Item 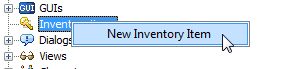
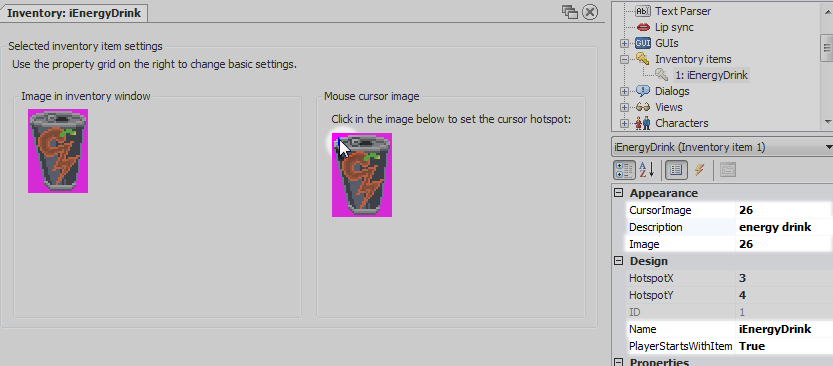
give the new item these properties:
- Name: iEnergyDrink
- Description: energy drink
- PlayerStartsWithItem: True
- Image: (select the image we added to the "Inventory" sprite folder earlier)
- CursorImage: (same as Image)
also, click somewhere on the top left rim of the can in the "Mouse cursor image" preview, to set the hotspot
open the
Events for the item and create a new event for
Look at inventory itemset the handler function to this:
function iEnergyDrink_Look()
{
  player.Say("It's a can of \"HOT-KICK\" Brand Sweet Chilli Energy Drink.");
}
see here that to do double-quotes
" inside a line of gametext, that is itself enclosed in double-quotes, you need to put a backslash
\ just before it... i.e.
\"HOT-KICK\" here will appear as plain old
"HOT-KICK" in the game
anyway, run the game now and donny should be carrying the can of energy drink!!
h'okay...! phew! that's it for now... Gaming World Forums
 GOOD AGS TUTORIALS/GUIDES?