Two things I find help a lot are
- manually unwrapping by cutting edges etc rather than doing the automatic segmenting options. a lot of the time the automatic stuff can lead to sorta awkward unwraps that are difficult to apply textures to etc or where there's a ton of tiny different awkwardly-shaped segments. if you do stuff manually then it takes a bit more time but i think it's def. worth it for more complex models!
- if you do it manually then another useful thing is unwrapping different sections of the object individually and then putting all the maps together at the end. basically this means you can cut it up into smaller basic shapes etc and it's easier to deal with if something doesnt unwrap properly.
Basically i'm not good enough yet to talk properly but here's a guide to how i do it
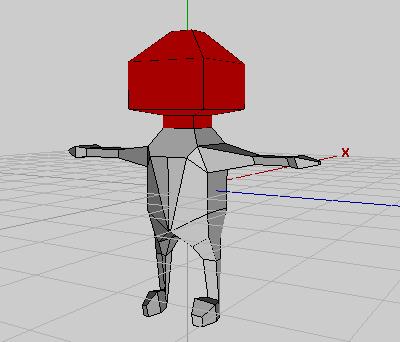
1. select the faces of the object that you want to work with
2. rightclick and go to .uv mapping
3. a new window will pop up. the thing you have to do is uh cut the edges between faces so that the whole thing can unfold properly?? idk how to explain it, but if you've ever made a paper cube by folding up a piece of paper that looks like
[]
[][][][]
[]
and glueing the edges together then it's basically that but in reverse. so we start with the cube and want to cut the edges so that we can unfold it to the 2d paper squares.
4. Go to edge select mode and select the edges that let you do this. easier said than done etc but this is mostly trial and error! you can do it in fancy ways like the cube example but i find the easiest is to just split it into a bunch of very simple sections and unwrap from there.
in the picture below i start unwrapping the neck by seperating it from the rest of the body and then cutting one of the edges so it can unfold into a line of four rectangles. when you have finished selecting the edges, right-click and select "mark edges for cut". marking them makes them go orange. also note that you can use l+leftclick to select all the edges that form a loop with the one you click!
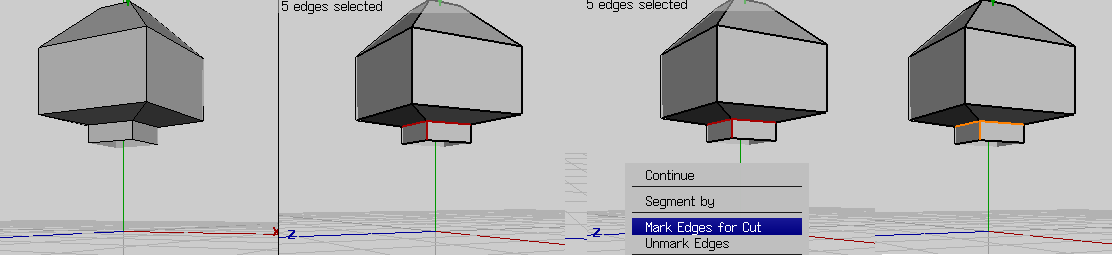
Then i can split up the rest of the head into easy to deal with pieces. i can cut the face section away from the rest so that its easier to work with, and then i'll make seperate cuts for the top of the head, underneath the head, and a final piece consisting of the two side parts and the back.

4. once thats done, rightclick and select "continue". it gives a few different options for the way we can unwrap the parts we've cut such as unfolding, projection normal, etc. i'm honestly not sure what the difference it and sometimes one will give a better result than another! i find 'unfolding' is generally the best and thats what we'll do here.
5. the result we get is this:
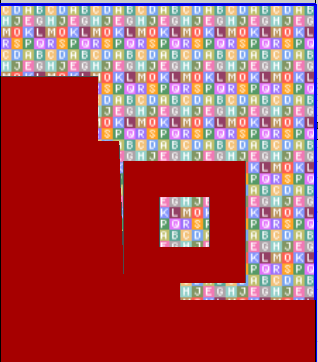
which looks incomprehensible! but if you move your mouse over it you'll find it's composed of different sections corresponding to the different parts of the head. if you're not sure about any of the parts you can select or unselect anything on the grid and it will automatically select or unselect the corresponding part of the main 3d view.
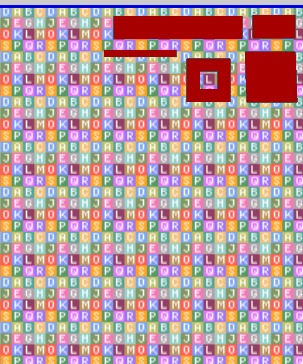
6. this is pretty messy looking, and since we're unwrapping the different sections individually we're gonna be using the same space for a lot more parts! if you rightclick you get options for rescaling, moving, rotating etc. use them to make the pieces smaller so that there's more room for the other parts. if you make them too small then textures can get stretched, though.
7. once you've done this, rightclick and hit "create texture". you can set the size and also the background and line colour for the texture blueprint.
8. Now select a different part of the model and repeat.
IMPORTANT MESSAGE:when you go on to add a new unwrapping to this image, DONT use create texture right away! it will save over your previous unwrappings since you don't have them selected at the time. instead, exit the uv mapping screen, then select the ENTIRE model, then go back into .UV Mapping and hit Create Texture.
9. once you've finished unwrapping the model to this texture image, go into WIndow -> Outliner. pick your texture in the same way vellfire said and then rightclick, select "make external", save it somewhere and then edit it into the texture you want. when you've finished this, save your texture and then rightclick it in the outliner window and select "refresh" to apply it to the model.
okay, hope this helps!
 Gaming World Forums
 Lowpoly 3D!